PF500KL Padfone S New Version will be launch in February (3GB RAM/64GB)


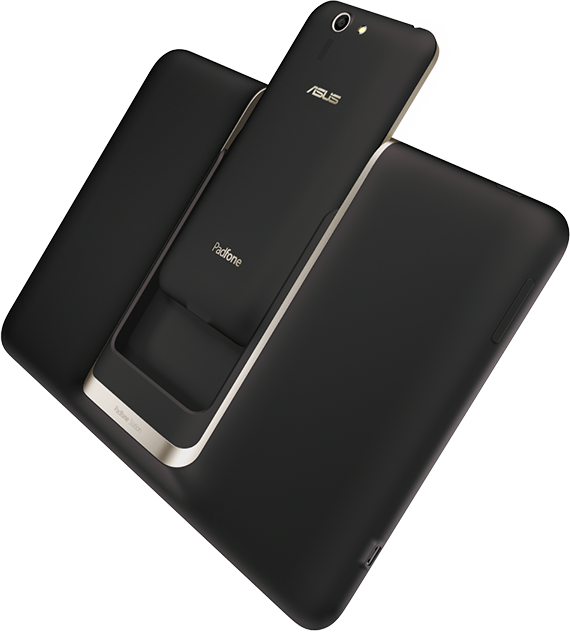
Besides of Zenfone Series, Padfone S become high success too. A powerful & enhanced mobile experience–Meet the PadFone S, the unique ASUS innovation that combines the best of the smartphone and tablet.

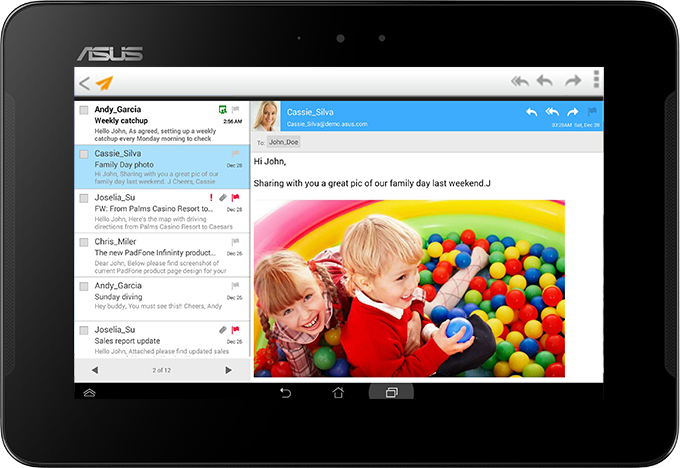
PadFone S perfectly demonstrates ASUS’s unique and innovative design philosophy. It is an effortless convergent device that combines technology and style. With PadFone S, you can enjoy the options of different screen sizes that are optimized for different user scenarios.

The PadFone S is a premium LTE smartphone with a 5-inch Full HD display that becomes an 8.9-inch Full HD tablet when docked into its companion PadFone S Station. It removes the redundant data syncing and duplication of data plans, providing users with an incredibly light and uncompromised premium experience. App layouts are optimized to fit the two different displays, ensuring you get the best possible experience in each mode.

According to my internal source and ASUS Taiwan Official Website, They will be launch new type of Padfone S which have 3GB RAM and 64GB Internal Storage. But the main Processor will be same as the old one, Qualcomm Snapdragon 801 MSM8974AB (Quad Core @ 2.3GHz)
Here is the Full Specifications of ASUS Padfone S:

ASUS Padfone S PF500KL
Platform Android 4.4 (KitKat) equipped ZenUI
Color Ceramic White / Obsidian Red
Product Size
PadFone deformation phone 143.93 x 72.46 x 9.98 ~ cm (width x length x height) PadFone tablet dock 250.4 x 172.25 x 11.63 ~ cm (width x length x height)
Weight 150 g (with battery) PadFone tablet base 514 g
CPU Qualcomm Snapdragon 801 MSM8974AB (Quad Core @ 2.3GHz)
Memory 2 GB / 3 GB RAM
Data storage applications 16GB / 64GB built-in storage space **

5GB lifelong ASUS Webstorage
Memory Slot Micro-SD card (up to 64 GB)
Link Technology WLAN 802.11a / b / g / N / ac

USB 2.0

Bluetooth V4.0

NFC
single SIM card slot Micro SIM
Internet technical standards LTE / WCDMA

DC-HSPA + download speed: 42 Mbps / upload speed: 5.76 Mbps

LTE: the maximum download speed 150 Mbps / upload speed: 50 Mbps 3G: WCDMA: 900/1900/2100 2G: GSM: 850/900/1800/1900

4G: FDD-LTE: 700/900/1800/1900/2100/2600 * 2
Other features
Support GPS A-GPS
Battery 2300 mAh lithium battery PadFone tablet dock 4990 mAh lithium battery
Standby time 417/528 hours (2G / 3G)

Talk time

30/22 hours (2G / 3G)
Camera front camera 2 million pixel

camera on the back of 13 million pixels

PixelMaster

PadFone tablet dock front lens 1 million pixels
Video features
Video playback: up to 1080p MPEG4

MPEG4

H.264

AVC H.264

H.263

H.264 1080pHD

3GP

Ogg

Audio Recording:

H264 AVC

MPEG-4 SP

MPEG-4 ASP

VP8

VP9

MPEG4 up to 1080p @ 30fps

MPEG4 up to 1080p @ 30fps

H.263

H.264

H.263 VGA @ 24fps

H.263 VGA @ 30fps

H.263 QVGA @ 15fps

@ 720p H.264 Video Encode Decode @ 1080p

H.264HD 1080p

H.264 1080p @ 30fps Video Encode and Decode

3GP
Gravity sensor / electronic compass / proximity sensor / ambient light sensor

ASUS TAIWAN

Asus Zenfone 2 Hands-on Review


Today Asus Zenfone Blog will Leaks some Photos and Add Fast Review About Zenfone 2. At CES 2015 ASUS unveiled ZenFone 2, the flagship smartphone in the new-generation ZenFone family. With a gorgeous all-new ergonomic design, a 5.5-inch Full HD IPS display, 13MP/5MP PixelMaster cameras, a 2.3GHz 64-bit Intel Atom processor with 2GB/4GB RAM and 4G/LTE connectivity, ZenFone 2 delivers powerful all-round performance.

Zenfone 2 | www.asus-zenfone.com
From Left to Right: Zenfone 5 LTE, Zenfone 2, Zenfone 6, Zenfone 2

Zenfone 2 | www.asus-zenfone.com
Zenfone 2 Upper Bezel is reduce, compared with zenfone 5LTE

Zenfone 2 | www.asus-zenfone.com
Brand New ZenUI

Zenfone 2 | www.asus-zenfone.com
Zenfone icon, Brushed Metal

Zenfone 2 | www.asus-zenfone.com
Zenfone 2: Volume Button on The Back

Zenfone 2 | www.asus-zenfone.com
Port Charger, Zenfone 2 Support Fast Charging

Zenfone 2 | www.asus-zenfone.com
Zenfone 2 Power Button On Top

Zenfone 2 | www.asus-zenfone.com
Side View

Zenfone 2 | www.asus-zenfone.com

 Overall:
  1. Better Performance + Power Consumption
  2. Better Speaker and Loud, Compared to Zenfone First Generation
  3. Bright LED Notifications
  4. Better Grip
  5. Better Display Quality
  6. NFC
  7. Support Fast Charging

Asus Zenfone 2 Spotted on Indonesian POSTEL


At CES 2015 ASUS unveiled ZenFone 2, the flagship smartphone in the new-generation ZenFone family. With a gorgeous all-new ergonomic design, a 5.5-inch Full HD IPS display, 13MP/5MP PixelMaster cameras, a 2.3GHz 64-bit Intel Atom processor with 2GB/4GB RAM and 4G/LTE connectivity, ZenFone 2 delivers powerful all-round performance.

ASUS Zenfone 2 Spotted on Postel with Status "Testing"


Zenfone 2 (ASUS - ASUS_Z00AD) has appeared on the Indonesian Postel Telecoms regulatory site. The Postel site has a strong track record of revealing new model numbers before the phones are announced. POSTEL is the authority in Indonesia that equivalent to the FCC in the United States. All the new devices that set to launch in Indonesia need to approve/certify by POSTEL. Zenfone 2 could be sell in Indonesia after the certificate from POSTEL is publish. And make Indonesia the first country to Sell Zenfone 2 ? Let's wait and see.

ASUS_Z00AD is Zenfone 2 With 1.8 GHZ Z3560 and 2 GB RAM, and ASUS_Z008D Could be Zenfone with Z3580 2.3 GHz and 4 GB RAM?

www.asus-zenfone.com
ASUS Zenfone 5 vs Zenfone 2

Source: Postel

Asus Zenfone 4 5 6 RAW Firmware for ASUS Flashtool


Asus Flashtool Interface

Today, Asus Zenfone Blog will share RAW firmware (all WW) for Zenfone Series. With this RAW Firmware you can Flash your Zenfone 4/Zenfone 5/Zenfone 6 With AFT (Asus Flash Tool).
If  You Reupload these links please let me know by comment box so i can add some mirror links if these links goes down/deleted. 


Asus Zenfone 4 .RAW


http://adf.ly/wWHb6


Another Link:
http://adf.ly/wWHb6
Mirror  1 (mediafire, thx to Tim en )


Asus Zenfone 5 .RAW


http://adf.ly/wWHb6


Another Link:
http://adf.ly/wWHb6
Mirror  1 (mediafire, thx to Tim en )


Asus Zenfone 6 .RAW


http://adf.ly/wWHb6


Another Link:
http://adf.ly/wWHb6
Mirror  1 (mediafire, thx to Tim en )

[STOCK ROM] for Equinox Night flash via SPFT

FLASHING WHOLE STOCK ROM
this will reset everything except the files in your SD card! what will be erased includes your recovery, your data files, your custom partitions, your custom system (rom)

Equinox Night Stockrom


Requirements:
PC
USB CABLE
Download Stock Rom:
 CMEquinox_Night


I am not resposible for any damage or soft/hard brick will happened to your device!

STEPS:

1. First of all open SP Flash Tool, then click Scatter-loading button to load the correct scatter file "MT6589_Android_scatter_emmc" inside your stock rom folder

--> some file are checked, while others are not .. DON'T CHECK and UNCHECK items if you don't know what's up :) just proceed to 2.


2. Now, turn off your phone (it will vibrate once it is fully turned off)

3. Immediately Press F9 (or hit Download button on SP flash tool), then confirm and connect your phone into the computer via USB data cable.

4. The process will start and a red progress bar will appear.

* If the charging battery icon appears instead, remove USB cable then repeat step 3, but if the flashing proceeds, DO NOT REMOVE THE USB CABLE

5. After the red progress bar is complete, next comes a purple progress bar and then the Yellow one (w/c means it is flashing the files)

6. When the yellow bar is complete, you'll get a popup with a green circle and Download OK message

7. Flashing is done, and you successfully flashed the stock rom

8. When the phone starts, it will TAKE AWHILE (wait for it)

9. Go to settings ->backup and reset -> Factory Data Reset -> Reset Phone

10. Now when your phone is already up and running, Check your IMEI by dialing *#06# , check if the 2 IMEIs are the original ones from your box or back of your phone behind the battery, if not, restore your IMEI using MTKdroid tools


TESTED AND WORKING!
CREDITS TO OXL GROUP AND TO SIR ARES ESCUDERO FOR THE GUIDE!

Learn how to change Screen Lock Icon Pattern(Modding Tutorial Part 2)

 This is my second Part of my Tutorial for Modding. Our previous tutorial is regarding modding in MMS Bubbles. Now I will teach you on  how to change icon of Screen Lock Pattern. But before you proceed please make a back up of your  phone. Please read and follow carefully.

I am not resposible for any damage or soft/hard brick will happened to your device!

Requirements:

2. Customized Screen Lock Pattern Icon

Procedure:
1. Go to root explorer.
2. Open Root > System > Framework
3. Copy framework-res.apk to your mmc
4. Extract all framework-res.apk
5. Extract the sample Screen Lock Icon
6. Go to MMC > SpeedSoftware > Extracted > framework-res > res > drawable-hdpi
7. You will see the files
btn_code_lock_default.png
btn_code_lock_default_holo.png
btn_code_lock_touched.png
btn_code_lock_touched_holo.png
indicator_code_lock_drag_direction_red_up.png
indicator_code_lock_point_area_green.png
indicator_code_lock_point_area_green_holo.png
indicator_code_lock_point_area_red.png
indicator_code_lock_point_area_red_holo.png
indicator_code_lock_point_area_default_holo.png
8. Move and Replace the customized icons to the folder then overwrite it.
Note: This could be the same file name
9. Now, long press framework-res folder, Zip this folder.
10. Rename framework-res.zip to framework-res.apk
11. Ready to push in system. Make sure system folder is in Mount R/O.
12. Now, move framework-res.apk to framework folder. Overwrite it.
13. Long press and change permission. into rw-r-r or copy like this permission on image below.
MMS APK

14.. Reboot.

I only tested this tut on My Phone Rio Fun both stock ROM and AfterLife ROM. I'm not sure if could work on your device. 

CREDITS:
Jay Cy
Pinoyden
UNDERGROUND

Asus Zenfone 5: Most Popular Android Smartphones of 2014 in Four Countries


Top Popular Smartphones in The World 2014


Last Week AnTuTu released the end-of-2014 awards. The Xiaomi Mi 4 captured almost 17% of the market with Samsung Galaxy Note 3 and this year's flagship from the South Korean giant, the Samsung Galaxy S5, trailing closely behind. The top three are then followed by Xiaomi Mi 3, ASUS ZenFone 5, MEIZU MX 4, Samsung Galaxy Note 4, One Plus, Google Nexus 5, and Samsung Galaxy 4. Four models were from Samsung, two from MEIZU, one from ASUS, and one from LG (Nexus 5).

ASUS ZenFone 5 being No. 1 on four countries :

Zenfone 5 being No. 1 In Taiwan, no surprise because ASUS Headquarter is in Taiwan :p

Zenfone 5 being No. 1 in Indonesia with 40% percentage, Wow almost a half percent. leaving Redmi 1S and Redmi Note at second and third place.

Zenfone 5 being No. 1 in Malaysia

Zenfone 5 being No. 1 in Vietnam

 Other Countries :

  • Samsung Galaxy Note 4 (HongKong) 
  • Samsung Galaxy Note 4 (United States) 
  • Google Nexus 5 (Russia) 
  • Samsung Galaxy Note 4 (South Korea) 
  • Samsung Galaxy S5 (Germany) 
  • Xiaomi Redmi 1S (India) 
Source: AnTuTu

Cherry Mobile Flare S3 Stock Rom

This tutorial teach you on How to fix bootloop Cherrymobile Flare S3 Octa (kitkat)
You can flash this via SPFT and TWRP. You can follow our tutorial here.
CM FLARE S 3 OCTA STOCKROM
STOCK ROM V11 or
STOCK ROM V.1.03

Flash via TWRP
StockROM_V11_20140927.zip


Credits:
CM FLARE S3 GROUP

TWRP Recovery V2.8.1.0 for Cherry Mobile Flare S3

USB STORAGE ENABLE via Recovery
MTP MOUNT ENABLE via Recovery

TWRP RECOVERY  FLARE S 3 OCTA


INFO
  • Ported By: Detpyrc
  • TWRP Recovery V2.8.1.0
  • Build 2
  • Compiled Dec 29 2014
WARNING:
  • I am not responsible for bricked device, Dead SD card
  • Before flashing it! "YOU!" are choosing to make these modifications, and if you point the finger at me for messing up your device, I will laugh at you so hard LOL
  • Make a NanDroid BackUP
TOOLS NEEDED: 
  1. Rooted Phone
  2. TWRP Recovery V2.8.1.0 .IMG 
  3. Rashr Flash Tool (download in Playstore)


Procedure:
1. Root your PHONE (FLARE S3) 
2. Make a NANDROID BackUP
3. DOWNLOAD               
TWRP Recovery V2.8.1.0 .IMG    


Rashr Flash Tool    
4. Install Rashr Flash Tool APK
5. Open Rashr Flash Tool and Choose      / RECOVERY / OTHER FROM STORAGE / AND FIND  "TWRP_V2.8.1.0_B2_recovery.img" from your sd card
6. Reboot into recovery :)

---------------------------------------
UPDATE LOGS:

Build 2.0
12/29/2014: Wipe Cache 1-3 Secs Implemeted and Clean up some codes 

Build: 1.0
12/06/2014: Fixed Cache Mount and dalvik-cache wipe*

---------------------------------------
CREDITS:
CM FLARE GROUP
TWRP   
XDA   
GOOGLE

Asus Zenfone 4 IMEI Recovery (Null IMEI)


Null Imei Problem on Zenfone | www.asus-zenfone.com

Null Imei Problem on Zenfone | www.asus-zenfone.com


Today I will post how to restore IMEI on Asus Zenfone 4. When your zenfone got null IMEI you can't call/text/data because your zenfone will not recognize simcard.


IMEI RECOVERY METHOD 1

  1. First root your device
  2. download and install terminal emulator
  3. download this and copy it to internal sd card
  4. open terminal emulator and type su
  5. grant superuser access
  6. type dd if=/sdcard/mmcblk0p3.img of=/dev/block/mmcblk0p3
  7. and enter
  8. after success restart ur phone and pray.

Asus Zenfone 4 A400CG Philz Touch Recovery CWM


Philz Touch Zenfone 4 | www.asus-zenfone.com
Philz Touch Recovery for Zenfone 4

ClockworkMod - also known under the name of Clockwork and CWM - 1 mini operating system for phones and tablets running Android . It allows you to intervene in the deep system to restore, install or modify the components that can not be done within the Android operating system is used. Even after allowing ASUS Bootloader Unlock Zenfone 4, so far they have Built and tested successfully on CWM Philz Zenfone CWM 4. 
  1. First, Bootloader Unlock your zenfone, click here
  2. Unpack, install and launch the app - Read over or pulled down to the bottom and volume terms Agree, do one again and click on the lock to start unlocking.
  3. Download philz touch recovery here
  4. Install And select Install Philz Touch Recovery and reboot, at first ASUS screen ( no circular motion) you hold Volume Volume + or - are able to recover 
DWYOR
Source: xda

How to edit MMS Bubbles (Modding Tutorial Part 1)

How to edit mms bubbles? Well, is easy just read carefully.
If you are fun of modding your phone to make nice and awesome.
This is suitable for you. I will teach you how to modify your mms bubbles like in image below.


This my sample in image below that works in myphone rio fun JB version:


MMS BUBBLE SCREENSHOT


I am not resposible for any damage or soft/hard brick will happened to your device!


Requirements:
Rootexplorer.apk
MMS Bubbles (sample)

First and most Important "BACKUP your PHONE"


Step 1. open rootexplorer then go to root folder system/app then

find MMS.APK

Step 2. Please copy in sdcard for back up


Step 3. open rootexplorer, open two window in 
xplorer,

 first window for changing bubbles then second  window for mms.apk in Sdcard..

NEXT Using rootxplorer tap and hold mms.apk in  sdcard will pop up, choose extract, then, go to extracted..

Step 4. locate or find res/drawable xhdpi or res/drawable hdpi then find the ff:

1. in.9

2. incoming2.9.png
3. incoming3.9.png
4. incoming.9.png
5. out.9.png
6. outgoing2.9.png
7. outgoing.9.png
8. outgoing_ip_message.9.png

Note: Some android phone has different bubbles name just find name near like incoming or outgoing


Step 5. Go to collection of  bubbles you download.. Just rename  exactly the name of original bubbles in example above.

Step 6. Copy and replace  bubbles in mms 
folder, res, drawable-xhdpi or res/drawable hdpi, 
then ask  to overwrite check
the small box , then tap replace..

Step 7. After replacing, Go back to  mms 
folder, tap and hold, pop up, choose zip this
folder, wait to finish, then go to zip, rename  Mms.zip to Mms.apk

Step 8. Copy MMS.apk to system/app folder , then ask for overwrite select yes ,

tap and hold,then pop up, choose permissions,


MMS BUBBLE SCREENSHOT 2


set permission as rw-r--r--

format like this
MMS BUBBLE MMS.APK PERMISSION

Step 8. Then click ok and Reboot

ENJOY..!!!

Special thanks to Jay Cy for teaching me in modding.

CREDITS:
ultimate group and united.